ORCiD OAuth Setup
All steps below are for setting up Ego with ORCiDs free, public API (not the paid membership API). For full details on setting up OAuth 2.0 with ORCiD, refer to the Official ORCiD Documentation.
For your convenience, we provide summary steps here:
- Create an account with ORCid: If you don't already have one, set up an account on ORCiD. If you are an individual working alone with the Overture suite, you may use a personal account. However, if you work for a larger organization or institution, they may already have a designated account that you can or should use. Please consult your IT department if necessary.
- Log into ORCiD: Sign in to your ORCiD account.
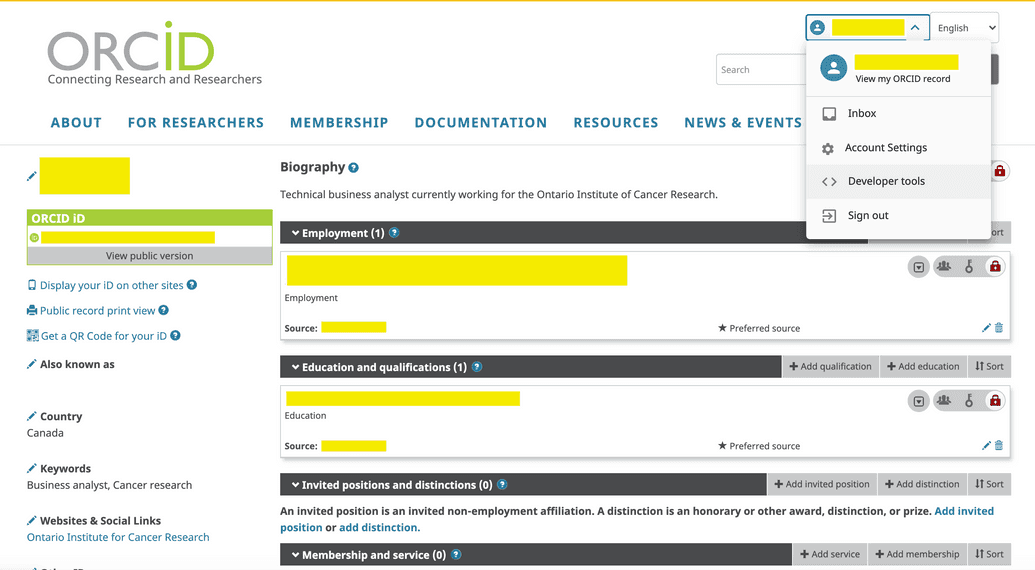
- Go to Developer Tools: Click on your profile icon in the top right corner, then select Developer Tools.
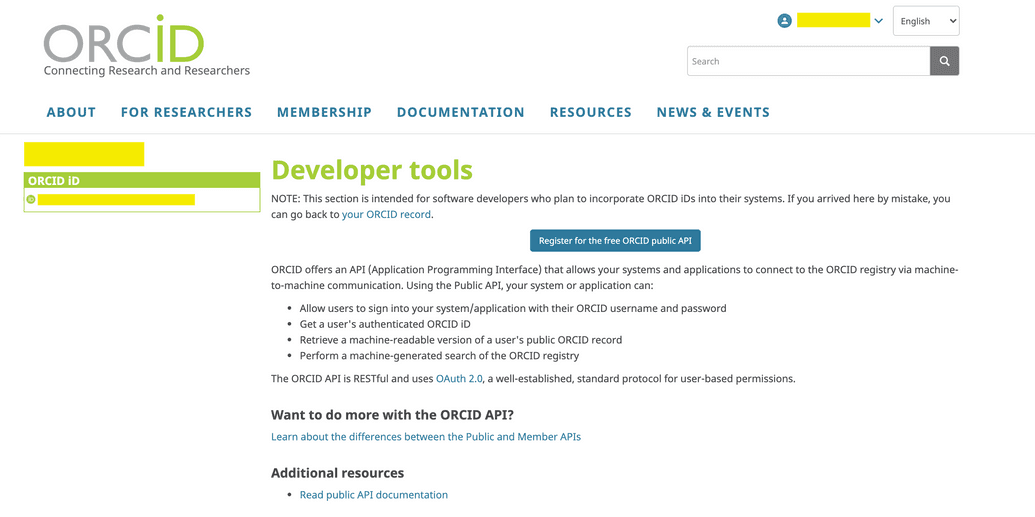
- Register for the free ORCID public API: Click on Register for the free ORCID public API:
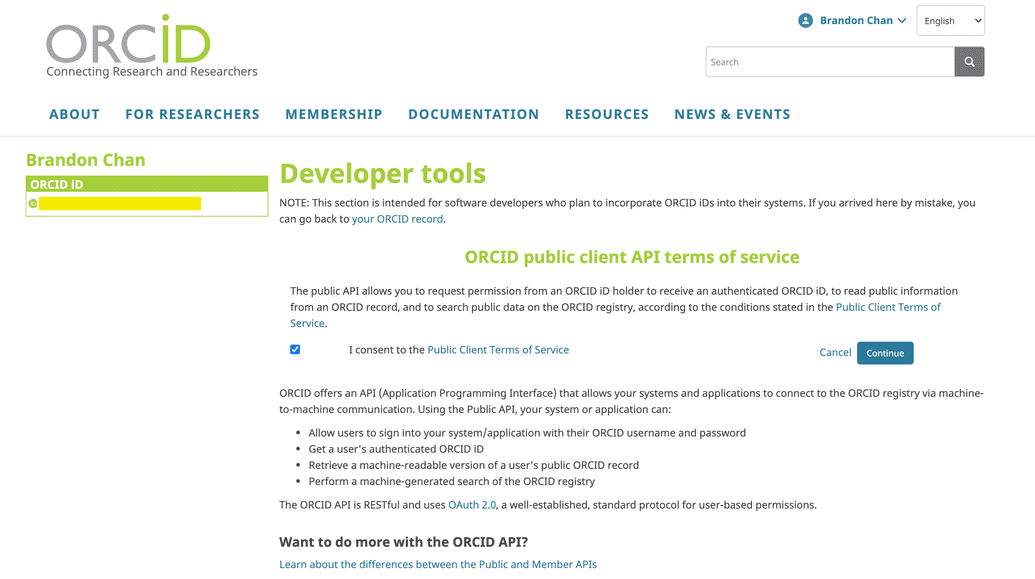
- Consent to Public Client Terms of Service: Read and consent to the Public Client Terms of Service, then click Continue:
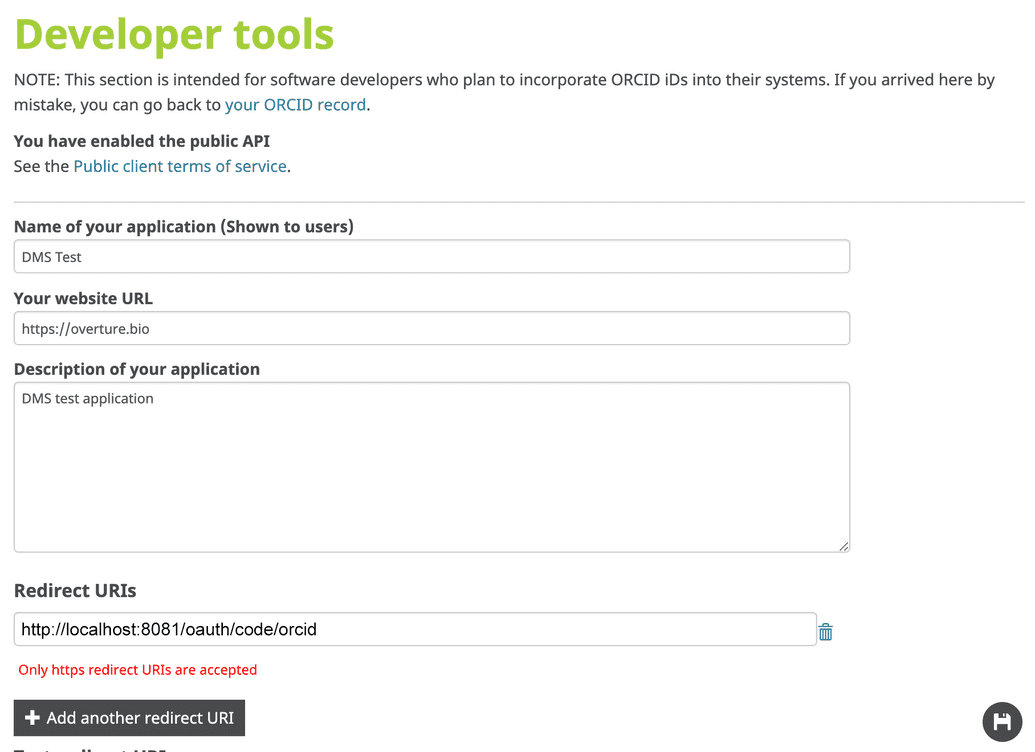
- Enter Application Details: Fill in the details for your application:
- Name of your application: A descriptive name for your app.
- Website URL: The URL to your app's homepage.
NOTE: ORCiD requires a real URL and will actually attempt to ping the site and establish its validity. If your app does not have a homepage, we recommend providing your institution or organization's homepage. If none are available, you can enter the Overture homepage, https://overture.bio.
- Enter Application Description: Provide a short description of your application.
- Add Redirect URIs: Under Redirect URIs, enter the URI where ORCiD will redirect users once they have authenticated with the provider, redirecting them back to Ego upon successful login:
- Local: http://localhost:
<port>/oauth/code/orcid - Server: https://
<myDomain>/oauth/code/orcid
NOTE: ORCiD may give a warning that "Only https redirect URIs are accepted", but can still enter an HTTP URI as indicated above. The application will still save and the Client ID and Secret will still be generated.
- Save Application Details: Click on the Save icon in the bottom right corner.
- Copy Client ID and Client Secret: After saving the app, the Client ID and Client Secret will be displayed. Copy these values and securely store them. You can always access and view these values by going to the ORCiD Developer Tools and viewing your app.
- Provide Client ID and Client Secret: During Ego installation, provide the Client ID and Client Secret when prompted.
Make User Emails Publicly Accessible
When a user logs in via their identity provider Ego captures, stores, and displays a contact e-mail. However, some providers may allow their users to make their email addresses private and not publicly accessible to an external service.
Private emails will not be able to login via Ego. To prevent this the user can change their privacy setting to allow access to their e-mail via that provider or login with a different provider that does not have this requirement or setting.
Note: ORCiD is the only provider that currently has this capability where the user's email can be set to private.
Some users will want to retain their privacy and not share their e-mail publicly. As such, the Overture roadmap for Ego has a future enhancement to make this requirement configurable. However, for the current release, the two workarounds above must be used.
ORCiD
To make your ORCiD e-mail publicly accessible, see the instructions here, or follow these summary steps:
- Log into ORCiD: Sign in to your ORCiD account.
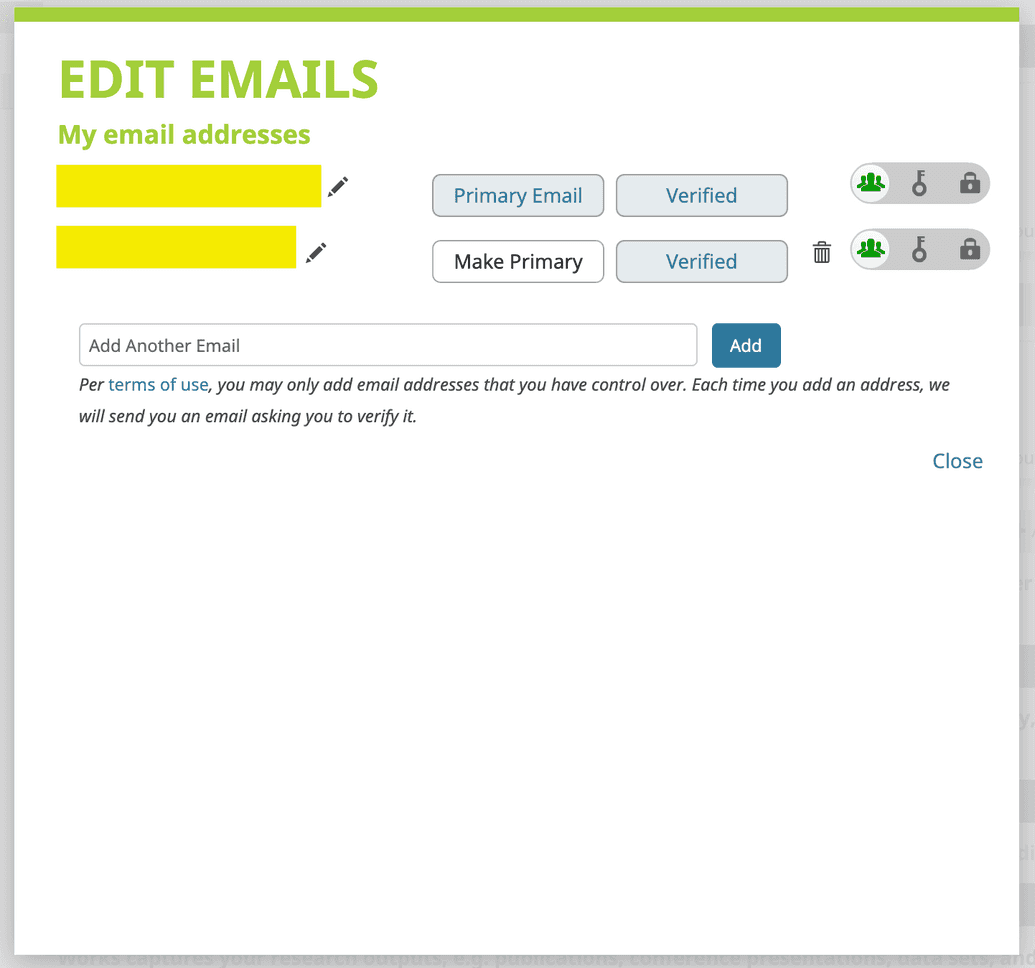
- Edit Email Settings: Scroll down to the Emails section in the left-hand navigation and click the Edit (pencil) icon. A pop-up will display with your registered emails.
- Adjust Privacy Settings: In the pop-up, you will see the list of your registered emails. Using the Privacy Settings Icons on the right side of each email, change the visibility setting to Everyone (leftmost icon) for each email you want to make publicly accessible.
- Save Changes: Once you have adjusted the privacy settings for your emails, click Save to apply the changes.
