Linkedin OAuth Setup
For full details on setting up OAuth 2.0 for an application to work with LinkedIn, refer to the Official LinkedIn documentation.
For your convenience, we provide summary steps below:
- Setup an account with LinkedIn Developers: If you don't already have one, create an account on LinkedIn Developers. If you are an individual working alone with the Overture suite, you may wish to use a personal account. However, if you work for a larger organization or institution, they may already have a designated account that you can or should be using. Please consult your IT department if required.
- Log into LinkedIn Developers: Sign in to your LinkedIn Developers account.
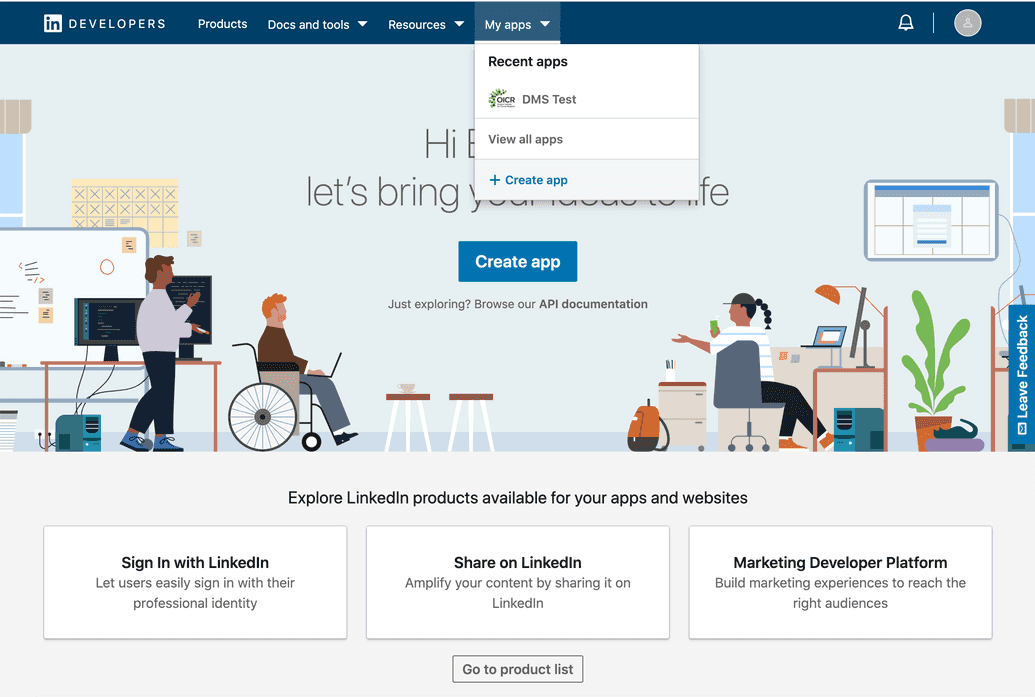
- Create a New App: Click on My apps > Create app in the top menu.
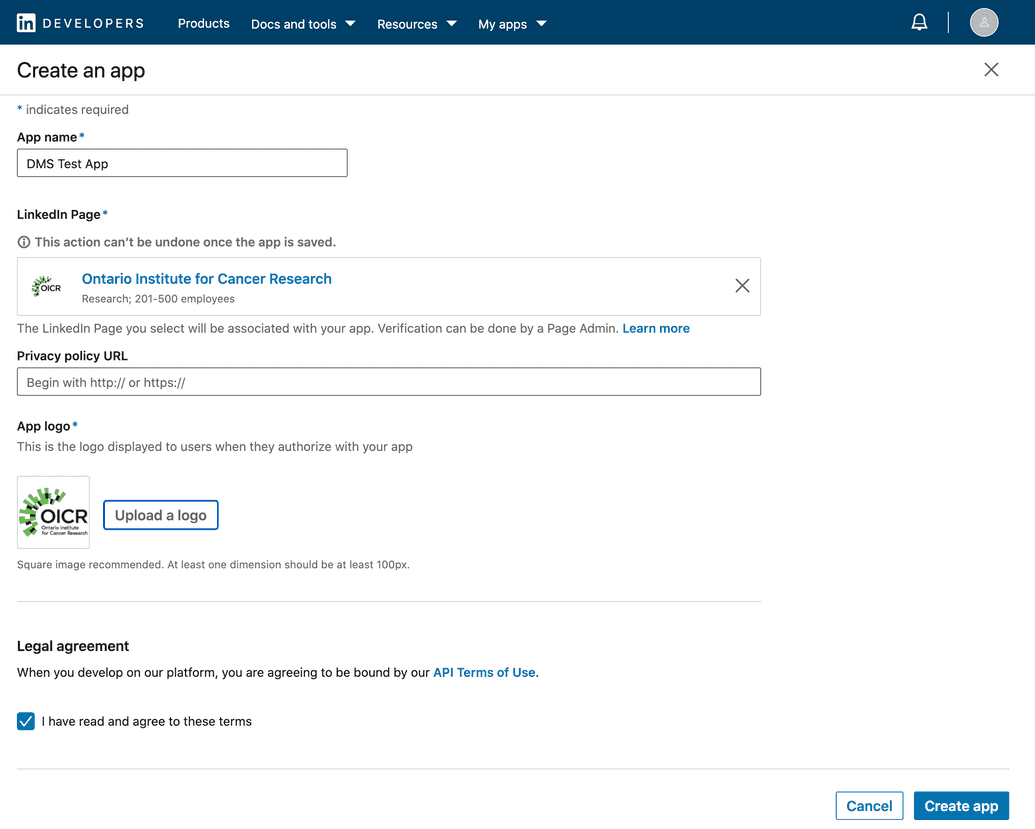
- Enter App Details: Provide the following information for your app:
- App name: Enter a descriptive name for your app.
- LinkedIn Page: Enter or select the LinkedIn page to be associated with your app. If you do not have one, you can create one (either real or placeholder) by clicking Create a new LinkedInPage.
- App logo: Upload a logo for your app.
- Legal agreement: Read and agree to the API Terms of Use.
- Create the App: Click on Create app.
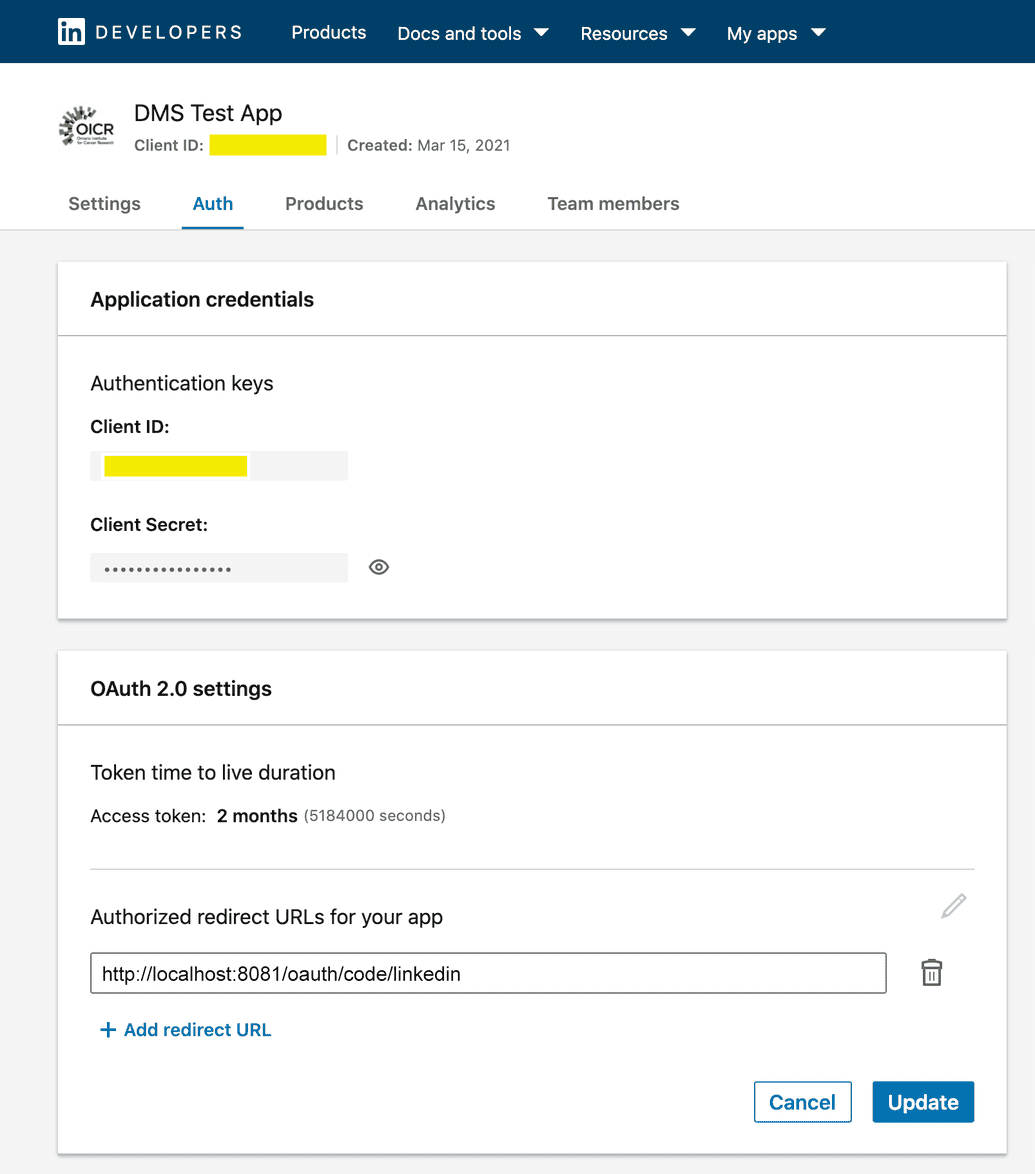
- Copy Client ID and Client Secret: After the app is registered, you will see the Client ID and Client Secret displayed. Make sure to copy and securely store these for later use. You can always access and view these values by going to the Auth tab in the app's top-level navigation.
- Configure Authorized Redirect URL: In the app's top navigation menu, go to Auth and under OAuth 2.0 settings, add an Authorized redirect URL for your app. This is the URI where LinkedIn will redirect users once they have authenticated with the provider (i.e., redirect them back to Ego once logged in successfully). Depending on your deployment, enter the following:
- Local: http://localhost:
<port>/oauth/code/linkedin - Server: https://
<myDomain>:443/oauth/code/linkedin
Use Client ID and Client Secret: During Ego installation, provide the Client ID and Client Secret when prompted. However, LinkedIn requires a few additional steps after Ego installation for the process to be complete.
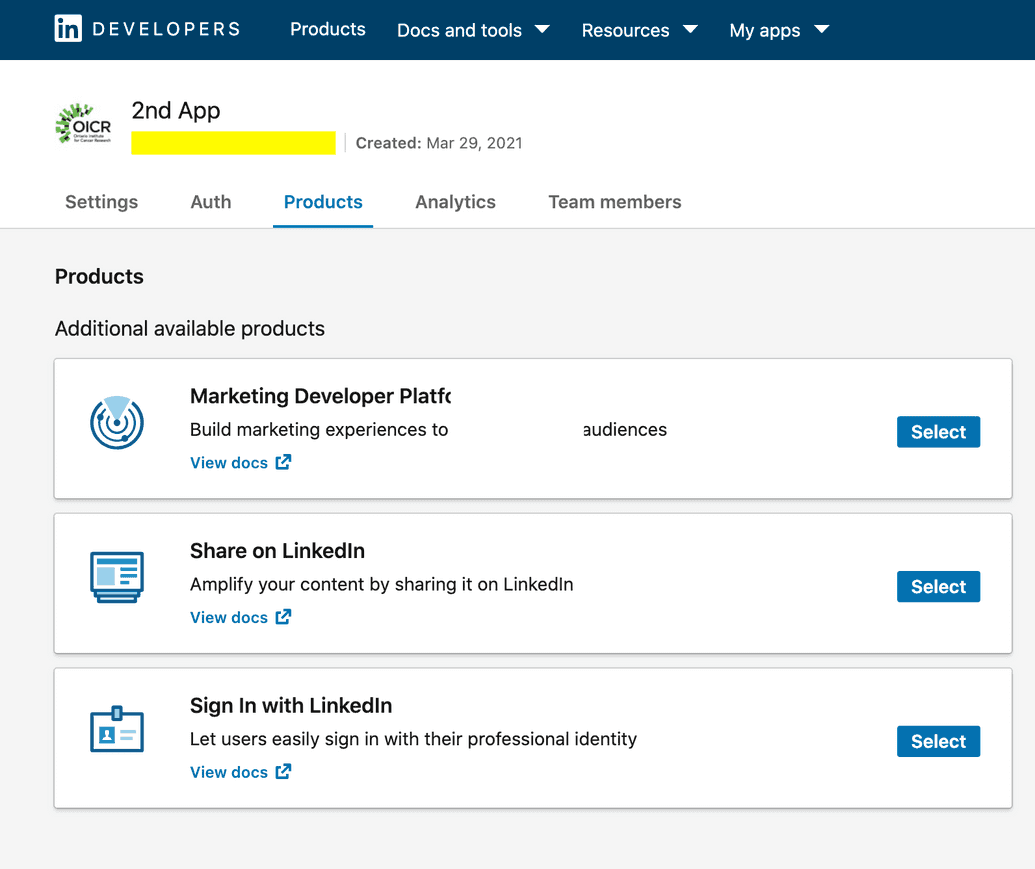
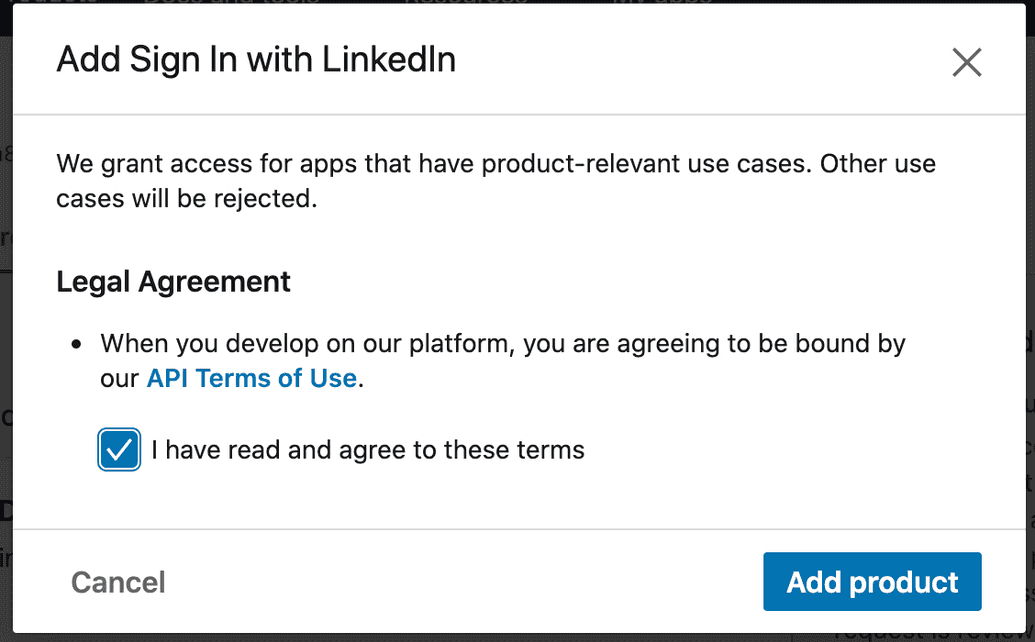
Add the Sign in with LinkedIn Product: Go to the Products tab and select the Sign in with LinkedIn product. This allows LinkedIn users to sign into your app.
- Agree to Legal Terms and Add Product: Read and agree to the legal terms, then click Add Product.
- Wait for Product Review: Your request to add the product will be submitted for review, with the status set to
Review in progress. Wait for some time and refresh the page to see if the product has been approved and added. Usually, this is very quick (within a few minutes), but allow up to 24 hours for this to process. If after 24 hours you still have not been approved, contact LinkedIn support.
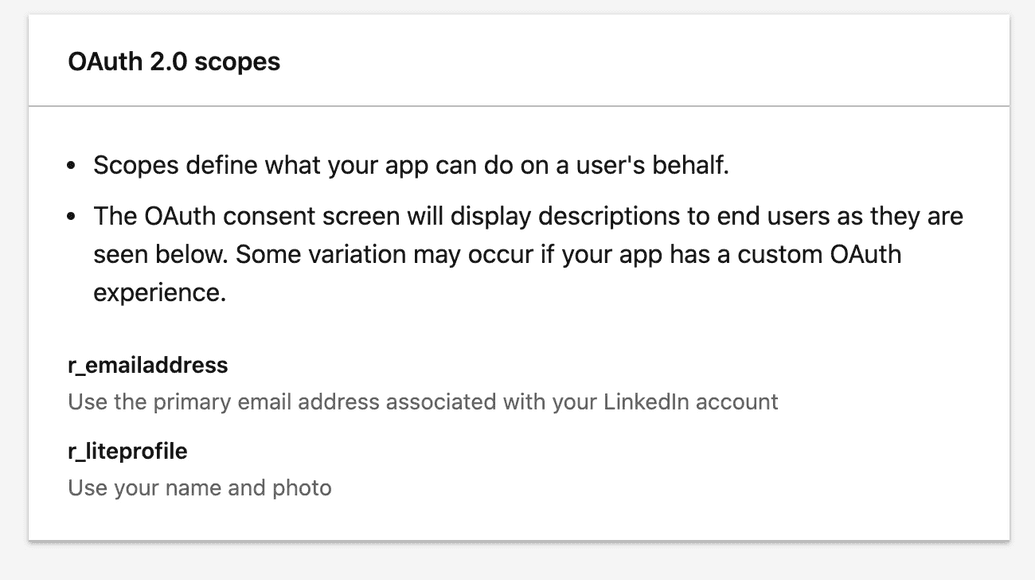
- Verify Scopes: To verify that the Sign in with LinkedIn product was properly added, go to the Settings tab. Under OAuth 2.0 scopes, verify that these scopes have been added:
r_emailaddress,r_liteprofile.
